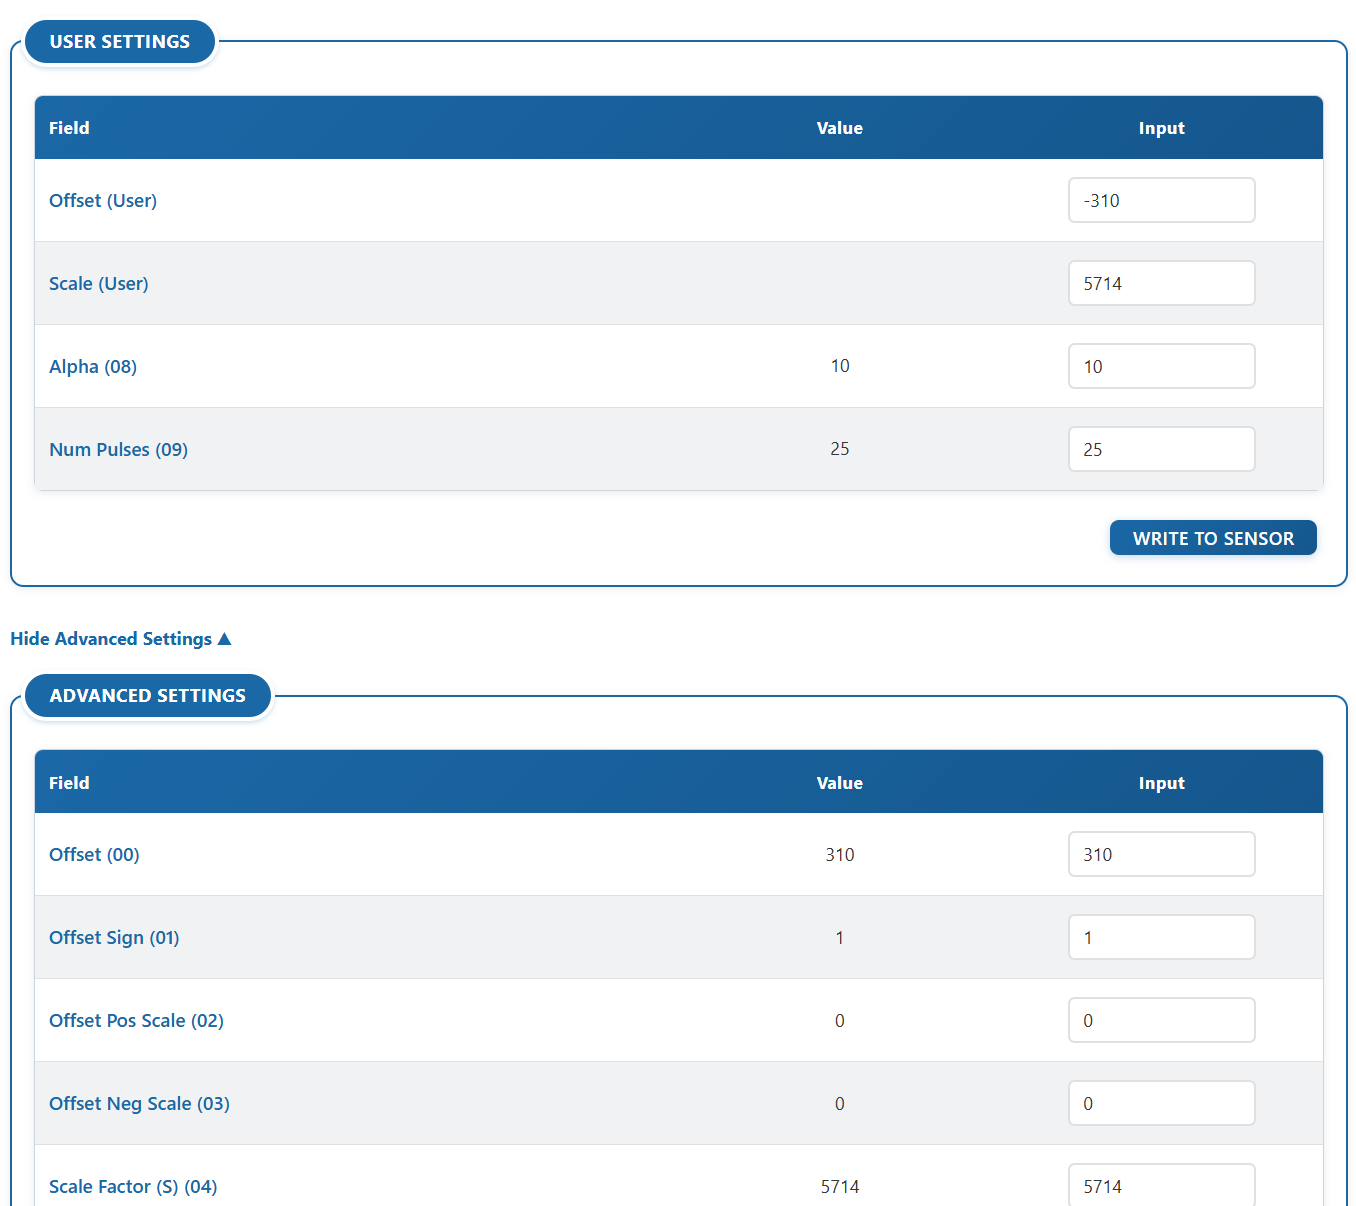
1. Accessing the Settings
Scroll down to the User Settings section. This area allows you to change how the sensor behaves (e.g., adjusting signal filtering, offsets, or measurement intervals).
By default, only the most common "Basic" settings are visible. If you need to access deeper technical parameters, click the "Show Advanced Settings ▼" link.
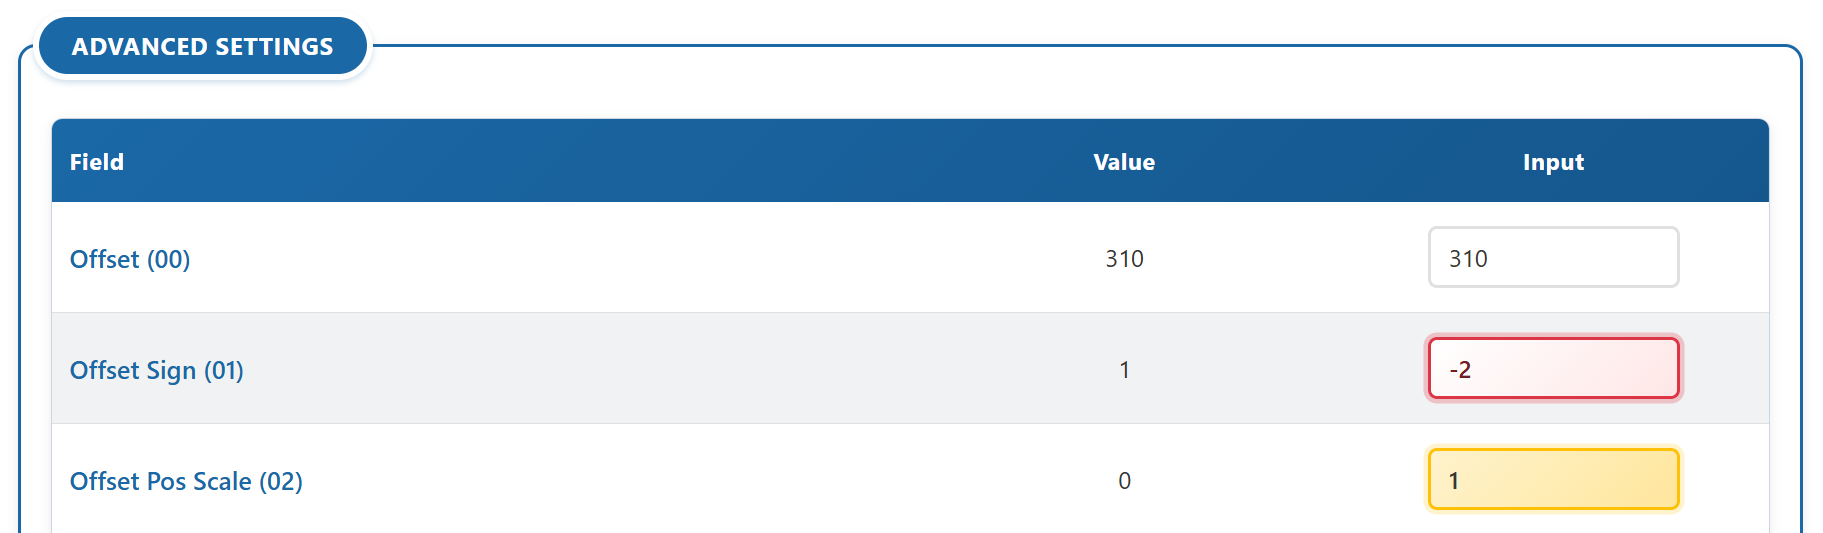
2. How to Edit a Setting (The Yellow Highlight)
To change a setting, simply click on the input box next to the field and type your new number.
-
🟡 Yellow Boxes (Unsaved): As soon as you type a new number, the box will turn Yellow. This is a safety feature to remind you that the value has been changed on your screen, but it has not been saved/written to the sensor yet.
-
🔴 Red Boxes (Invalid): If you type a number that the sensor cannot accept (like a negative number or a value that is too high), the box will turn Red. The app will block you from saving until you fix the red fields. You can hover your mouse over the box to see the allowed range.
3. Saving Your Changes (Writing to Sensor)
If you unplug your sensor or close the browser while fields are yellow, your changes will be lost forever. To permanently save your changes:
-
Review your yellow fields to make sure the numbers are correct.
-
Click the "Write to Sensor" button at the bottom of the table.
-
The button will say "Writing... Please wait", and then "Verifying changes..." as its checking to read the new values.
-
Once the process is complete, the button will return to normal, and the yellow highlighting will disappear from your input boxes. Your settings are now permanently saved to the hardware
Want to back up the settings you just saved? Check out Page 5: Data Management & Advanced Tools to learn how to export your configuration.