1. The Sensor Data Readouts
Once your sensor is successfully connected (the status bar is green), the TentApp will automatically begin pulling live data.
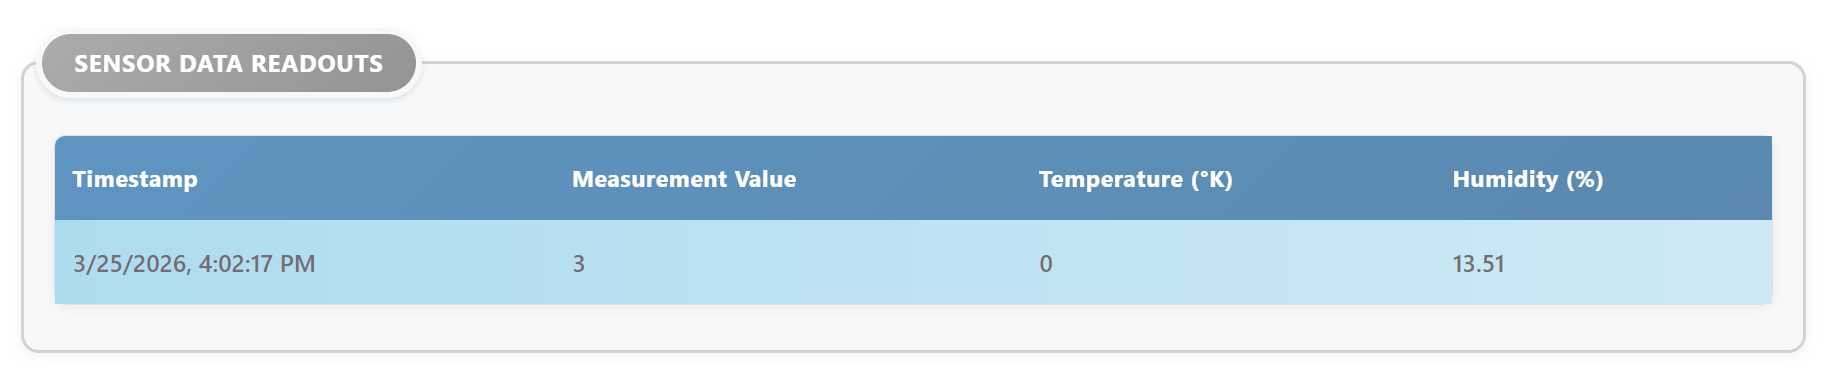
Scroll down to the Sensor Data Readouts section. This table updates continuously as new readings come in from the sensor hardware.
2. Standard Measurements
The different sensor variations might provide different data.
Most sensors (like the Tentacle), you will show the following standard information:
-
Timestamp: The exact date and time the data was received by your computer.
-
Measurement: The primary reading from the sensor.
-
Temperature: The internal temperature of the sensor probe.
-
Humidity: The internal humidity of the probe (useful for detecting internal leaks or condensation).
3. Sensor-Specific Features
Depending on which sensor you connected, the interface will automatically adapt to show extra features:
Inline (TUB) Sensor - Dual Measurements
Because some versions of the TUB sensor can accomodate two measurements, the interface will display two tabs labeled Measurement 1 and Measurement 2.
Click between these tabs to view the specific readouts and configurations for each measurement. The sensor continually monitors both, regardless of which tab you are currently viewing.
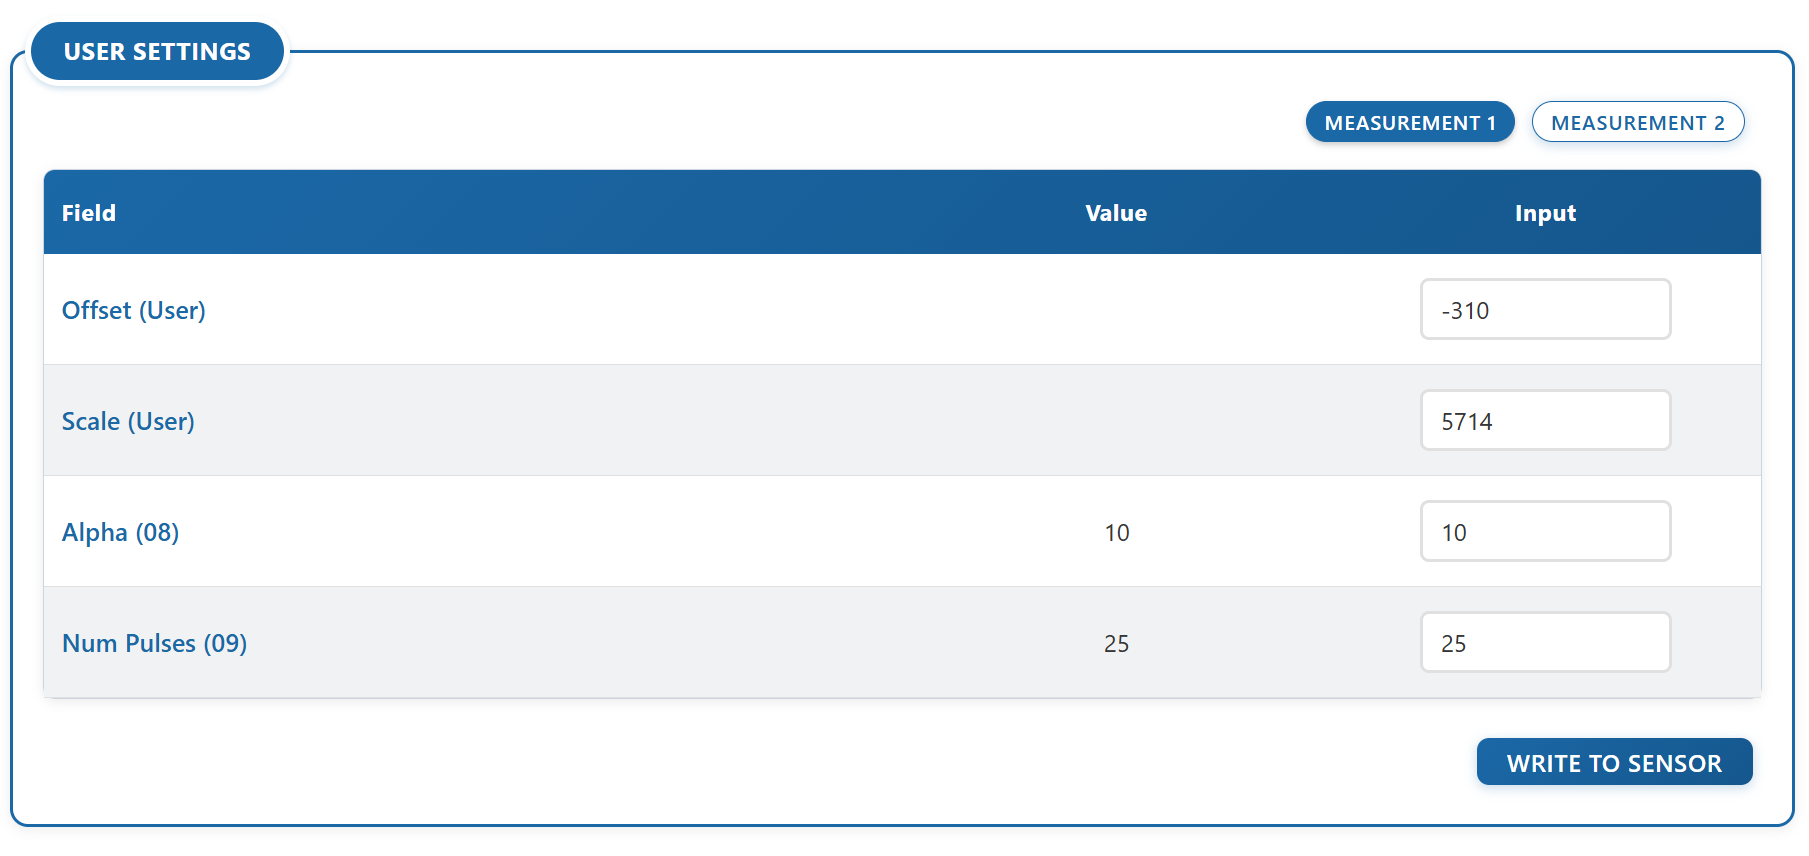

⚠️ Important Note for TUB Sensors with Dual Measurement:
When configuring an Inline TUB Sensor, you must save Measurement 1 and Measurement 2 independently:
Perform your changes in Measurement 1, click "Write to Sensor", and wait for the yellow boxes to clear. Then, move to Measurement 2, make your changes, and click "Write to Sensor" again.
If you attempt to modify both tabs simultaneously, the application will pause and remind you to save them separately to prevent hardware data loss.
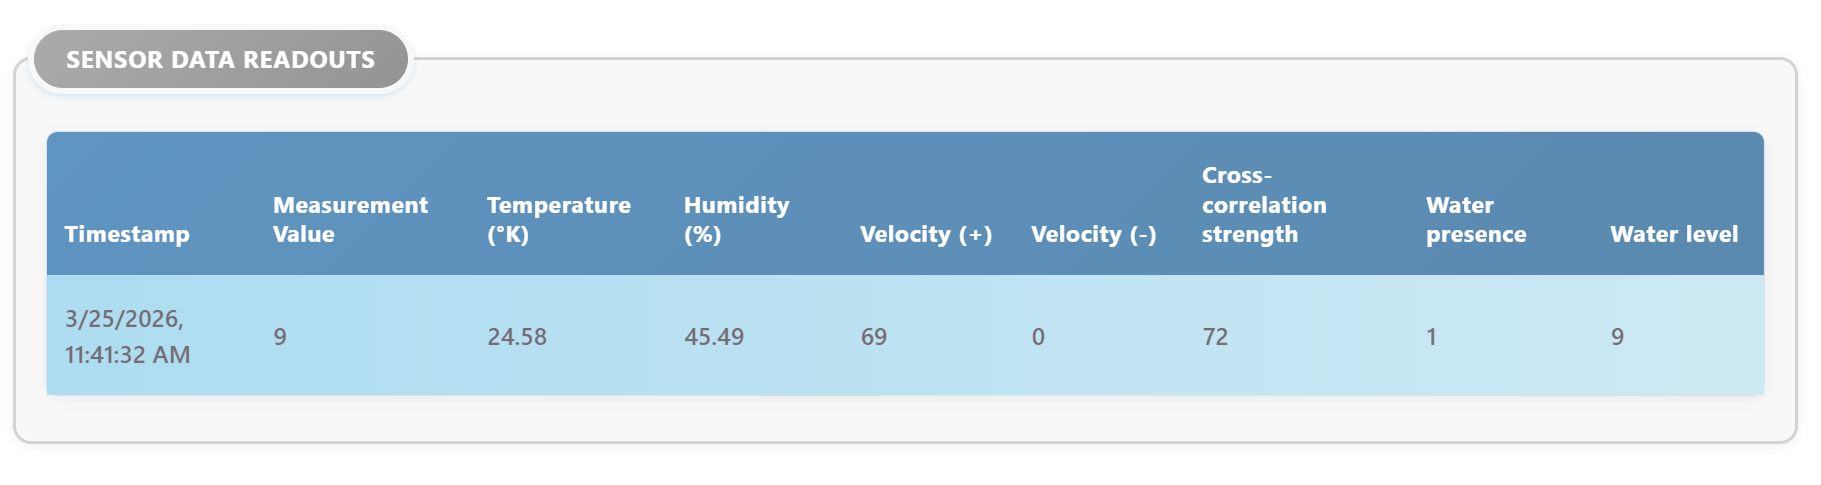
Nerite Sensor - Advanced Readouts
If you are connected to a Nerite sensor, the readouts table will automatically expand to include:
-
Velocity (+) and Velocity (-): The speed of the water flow.
-
Water Level: The detected height of the water.
-
Cross-correlation Strength: The signal quality of the measurement.
-
Water Presence: A simple indicator showing if the sensor is submerged.
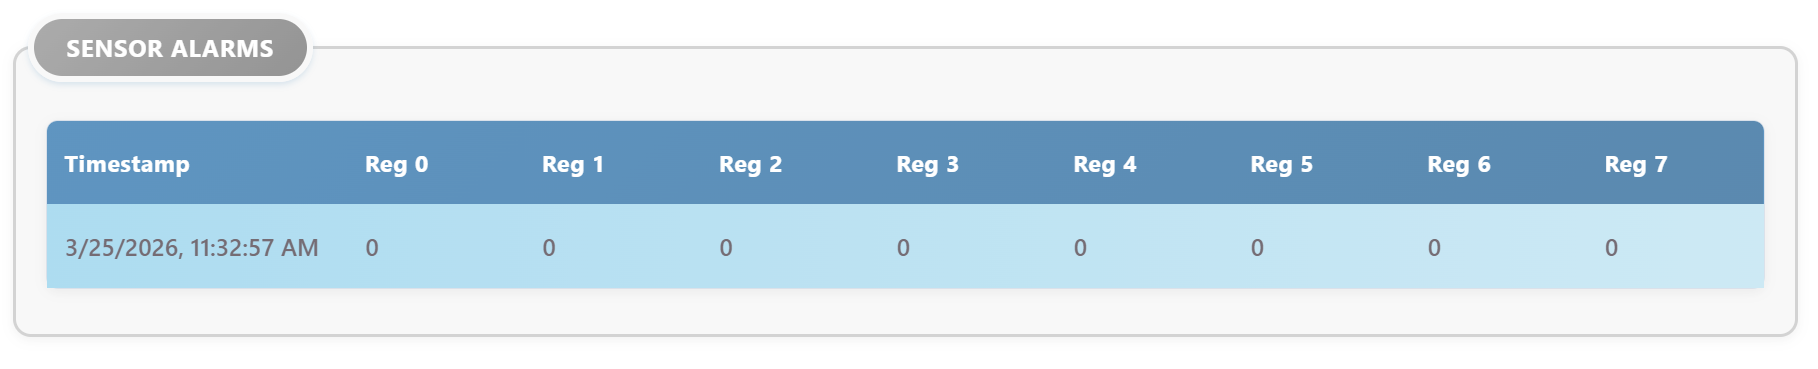
4. Sensor Alarms
Just below the main readouts, you will find the Sensor Alarms table. This displays the hardware's internal safety flags (often called "Coils").
-
A value of 0 means everything is normal.
-
A value of 1 indicates an active alarm or hardware trigger.
Check the manual of your sensor for sensor-specific information regarding the alarms for your sensor.